Configuration
Provider definition
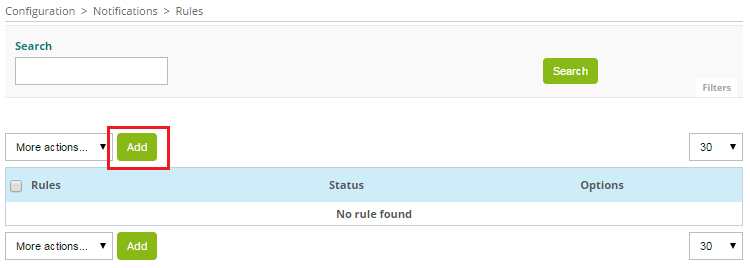
Connect to Centreon web interface with an administrator account and go to the menu Configuration > Notifications > Open Tickets > Rules.
Click on Add button:
Define Rule name and select Provider:

A new form appear. Define the name of the rule using Rule name field and select Mail as provider. New fields appear linked to the provider.
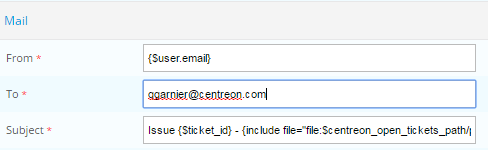
Define dedicated field linked to the provider:
From is the email address for the sender (By default, email of the user who create the ticket)
To is the email address of the receiver
Subject is the subject of the email.
Note
Please read documentation of your ITSM to select correct text.
The email will be in HTML format. So you can modify headers of the email by addind or removing predefined parameters:

The Body form allow to format the content of the email. Is divided into several part and is formatted using HTML norm and Smarty variables.
Note
Please read the official Smarty documentation to use Smarty variables.
The first part (first <div>) is used to setup the name of the user will try to create a ticket and the date of the action:
<div>
{$user} open ticket at {$smarty.now|date_format:"%d/%m/%y %H:%M:%S"}
</div>
The second part (second <div>) is used to write custom message (written from the popup will appear) when the user try to create a ticket:
<div>
{$custom_message}
</div>
A HTML block is used to format the two latest parts:
{assign var="table_style" value="border-collapse: collapse; border: 1px solid black;"}
{assign var="cell_title_style" value="background-color: #D2F5BB; border: 1px solid black; text-align: center; padding: 10px; text-transform:uppercase; font-weight:bold;"}
{assign var="cell_style" value="border-bottom: 1px solid black; padding: 5px;"}
The Body contains a bloc to display in a HTML tab information about host’s information and another one for service’s information. You can modify this blocs to insert needed information according to your ITSM API.
If you want to acknowledge automatically hosts and services when you create a ticket you can check the box Acknowledge.
Hosts and services configuration
To define if a host or a service have a ticket, the module will change custom macros linked to the object. So you have to associate first these macros to all monitored objects.
The best way is to create this macros to a template of host and a template of service inherited by all objects.
Edit the template and add the following custom macros:

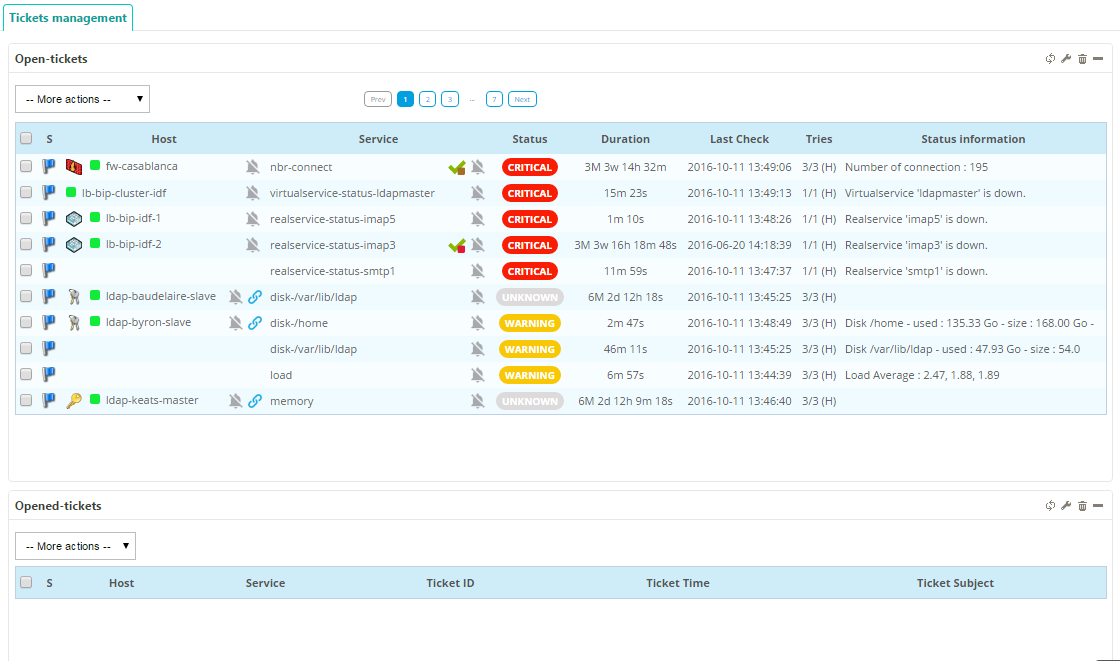
Widget configuration
To use the widget you have to add it into a custom view. Go to ** home > Custom Views** menu, select your view and click on Add widget button.
Define a title for your widget (for example: Open-Tickets) and select the widget Open Tickets. Do the same manipulation to add again this widget.
On the first widget, to open ticket, click on the configuration button:
Select the Rule previously defined
Don’t check the box Opened Tickets
Select other filters
Don’t check the boxes Display Ticket ID and Display Ticket Time
On the second widget, to display opened tickets, click on the configuration button:
Select the Rule previously defined
Check the box Opened Tickets
Select other filters
Check the boxes Display Ticket ID and Display Ticket Time
Advanced Configuration
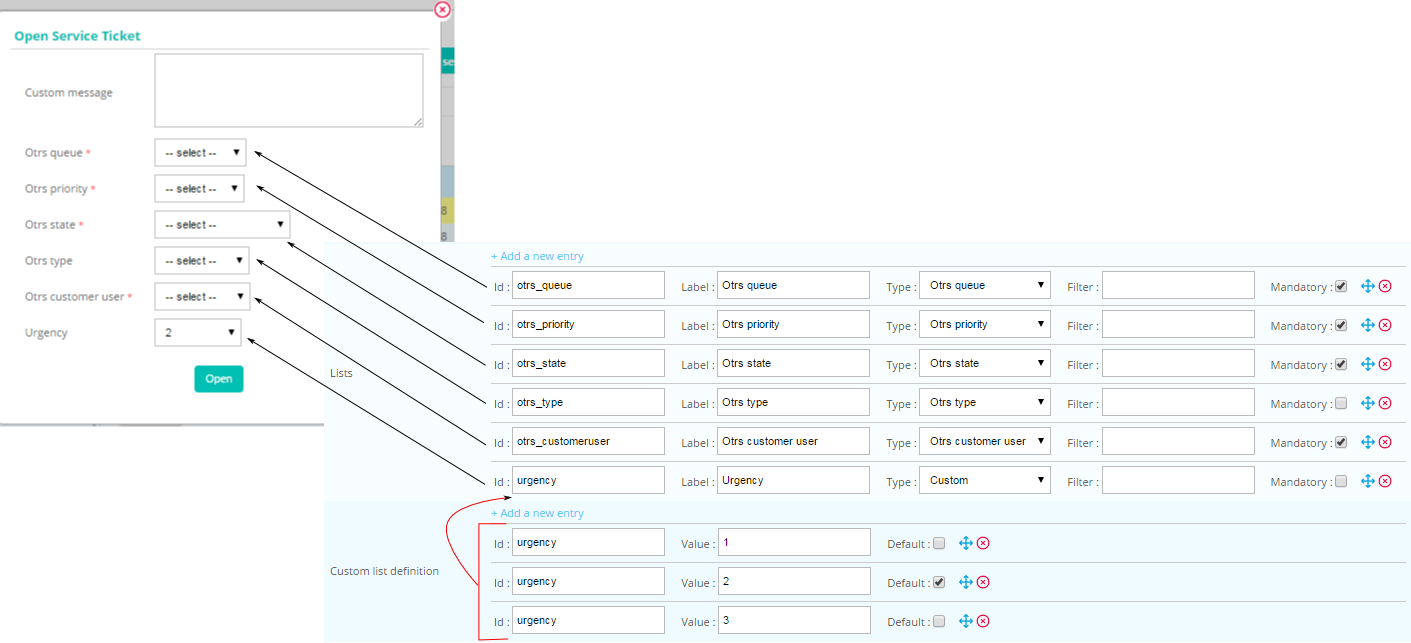
List definition
Before opening a ticket, an user can choose some options in a popup.
An option can be a select list. In the configuration provider, you can configure it
in Lists and Custom list definition. For each entry in Lists, you can define:
Id : alphanumeric value (must be unique)
Label : displayed in the popup
Type : which kind of list. There is 3 kinds of lists
Provider lists (data from the ticketting software directly)
Centreon lists (like
Host group)Custom lists (data from
Custom list definitionconfiguration. Id fields must be identical)
Mandatory : checked it if the user needs to set the option
The module stores the user list selection in an array (can be used in smarty section like body
or mapping ticket arguments). There are 3 fields (LIST_ID must be replaced):
{$select.LIST_ID.id}
{$select.LIST_ID.value}
{$select.LIST_ID.label}
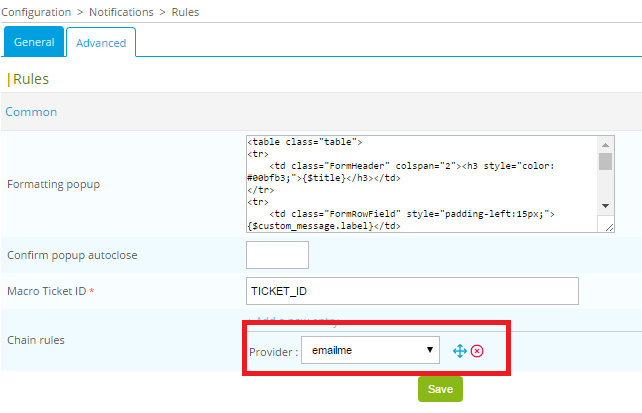
Chaining rules
After opening a ticket, you may need to send an email. The chaining rules system is designed to do it:
Create a new rule with the name
emailmeand the providerMailConfigure the
emailmein the rule of your opening system