Configuration
Note
All configuration will occur on the central server.
Declare poller as poller-display-enabled
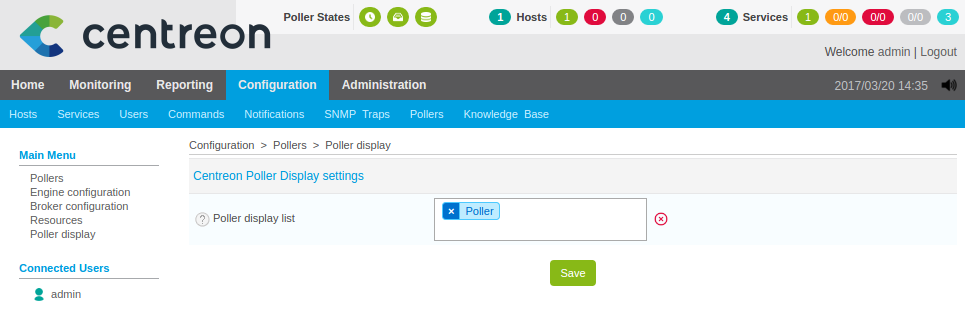
On the central server, you first need to declare the poller as poller-display-enabled. This can be done thanks to the centreon-poller-display-central module. Go to:
- ::
- Configuration > Pollers > Poller display
Add your poller to the list of poller-display-enabled pollers and save the changes.
Centreon Broker configuration
Specific Centreon Broker streams configurations are required for the “Poller” server that will host Centreon Poller Display. These streams are configured from the Central server like monitored ressources configuration. Only ACLs, contacts and general options can be configured at the Poller’s end.
It is necessary to setup three Centreon-Broker streams:
- A “classic” configuration for the streams between Centreon-Broker module on the Poller server and Centreon-Broker daemon (cbd) on the Central server
- A configuration for the stream between Centreon-Broker module on the Poller server and Centreon-Broker daemon (cbd) on the Poller server
- A configuration for the stream between Centreon-Broker module on the Poller server and Centreon-Broker daemon (cbd) on the Central server for RRDs files generation
“Poller” Configuration
In the first step you need a classic configuration for your Poller server which can be handled by the wizard. In the menu :
Configuration > Centreon > Centreon-Broker > Configuration > Add with wizard
- Select Simple Poller option.
- Click Next.
- Give a name to your configuration file (We will use “Poller” in our example).
- Select the desired Requester.
- Select communication protocol (NDO or BBDO). Protocol must be the same as the one used on the Central.
- Specify the Central server IP address.
You may not have to proceed with this step if your Poller server is already linked to the Central server.
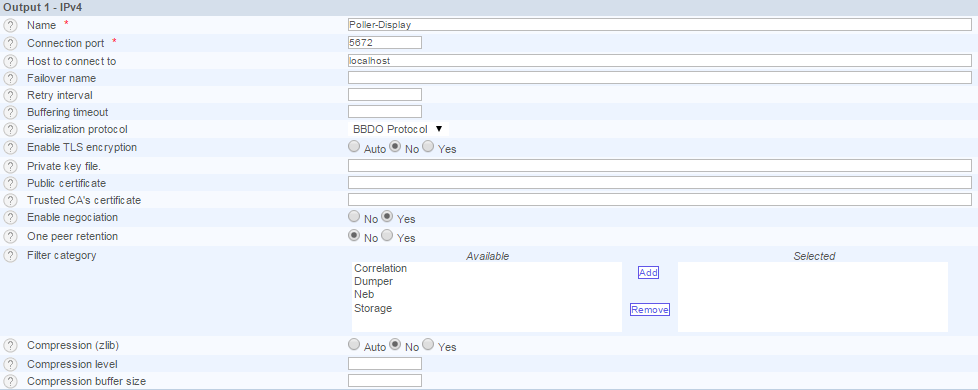
However you need to configure the stream between Centreon-Broker module on the Poller server and the Centreon-Broker daemon (cbd) on the Poller server.
For that, in the Poller configuration, you need to add an IPv4 Output type :
“Poller-Display-Broker” Configuration
The second step is to configure the stream between Centreon-Broker module on the Poller server and Centreon-Broker daemon (cbd) on the Poller server. A Centreon-Broker daemon (cbd) is required on the poller to generate datas in centreon_storage database for the Centreon light GUI to work. For that, go to:
Configuration > Centreon > Centreon-Broker > Configuration > Add
And follow the following steps.
Step 1 : General tab
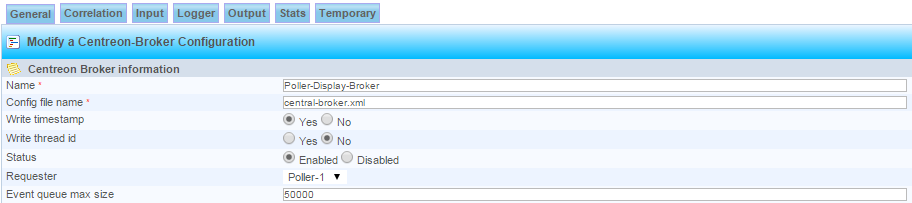
Configure your Broker file.
Note
You must name the configuration of the SQL Broker daemon file on the Poller with the same name of the Central for the init file to work out without any major changes. The name must be Central-Broker.xml even if server is a Poller.
Step 2 : Input tab
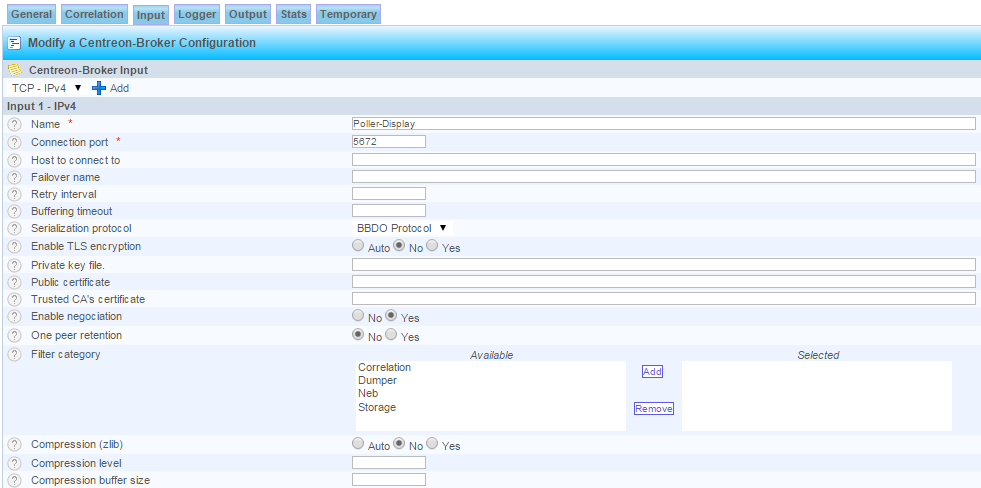
Add an IPV4 output type
Step 3 : Logger tab
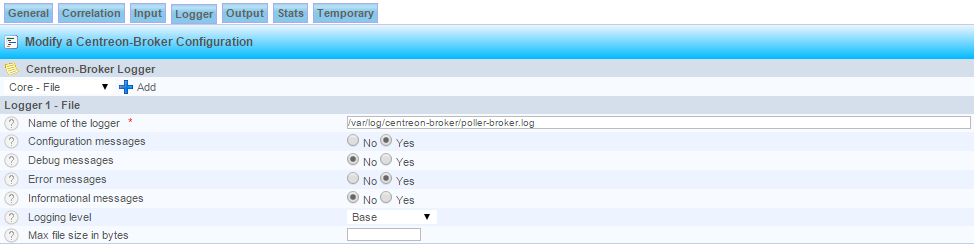
Add a Logger of File type
Step 4 : Output tab
Now we add several output.
Step 4a : ‘Real time’ database connection
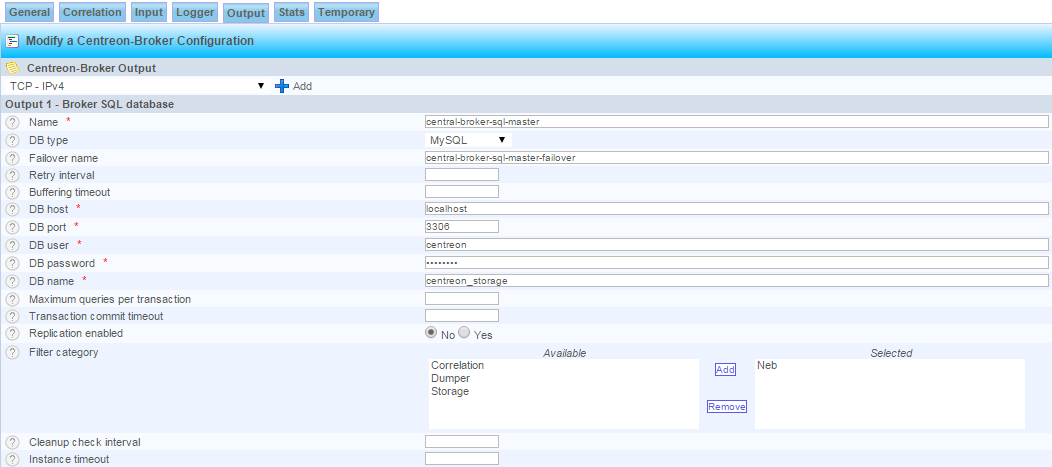
Add a Broker SQL database output type
Note
Warning, Centreon database access is made on the poller. Use the centreon MySQL user credentials of the poller.
Step 4b : data_bin data storage
Add a Perfdata Generator (Centreon Storage) output type

Note
The option Store in performance data in data_bin and Insert in index data must be set to Yes otherwise graphs won’t be generated.
Add an IPV4 output type
Note
Warning, Centreon database access is made on the poller. Use the centreon MySQL user credentials of the poller.
Step 4c : Network stream to the local RRD Broker
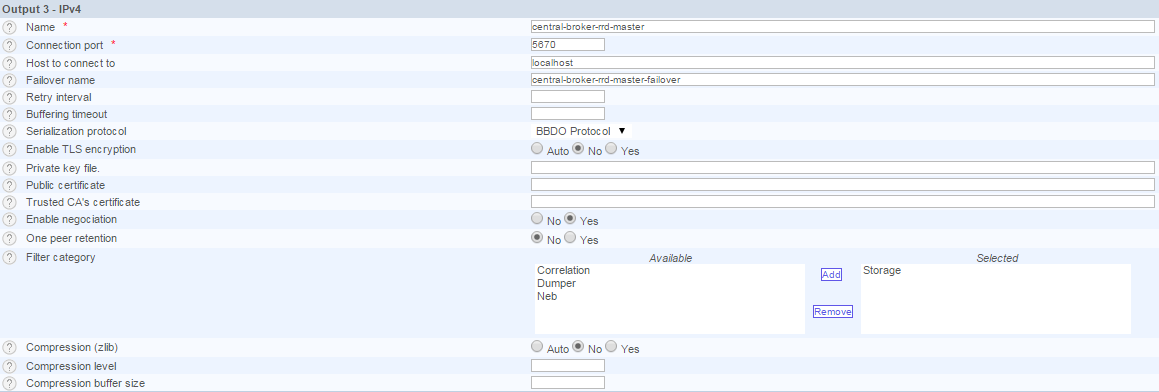
Add an IPV4 output type
Step 4d : Network stream to the local MySQL Broker

Add an IPV4 output type
Step 4e : RRD Failover
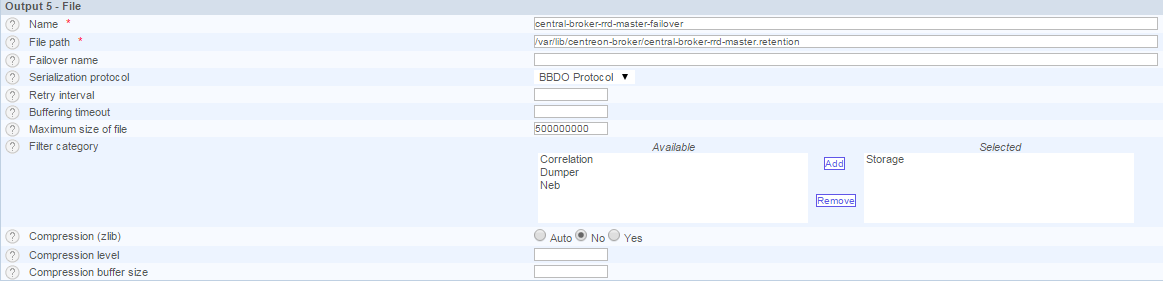
Add a File output type
Step 4f : SQL Failover
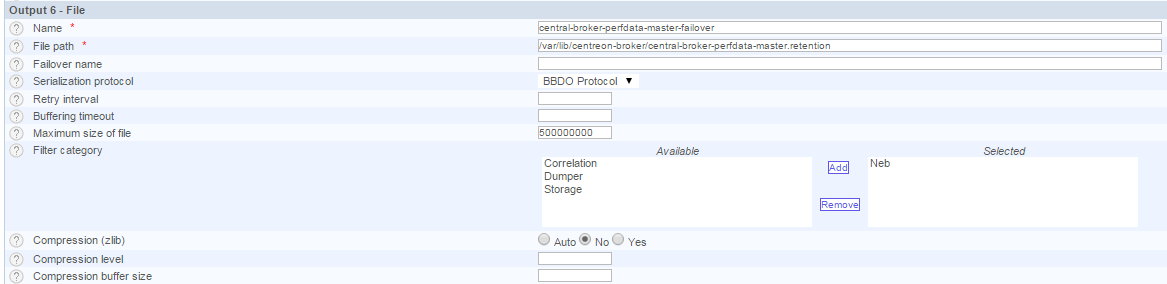
Add a File output type
You can now validate form. Configuration is now Ok for this object.
“Poller-Display-RRD” configuration
This step aims to configure the dedicated stream for RRD’s file generation on the Poller. For this go to :
Configuration > Centreon > Centreon-Broker > Configuration > Add
and follow this steps.
Step 1 : General tab

Configure your Broker file
Note
You must name the configuration of the RRD Broker daemon file on the Poller with the same name of the Central for the init file to work out without any major changes. The name must be Central-rrd.xml even if server is a Poller.
Step 2 : Input tab
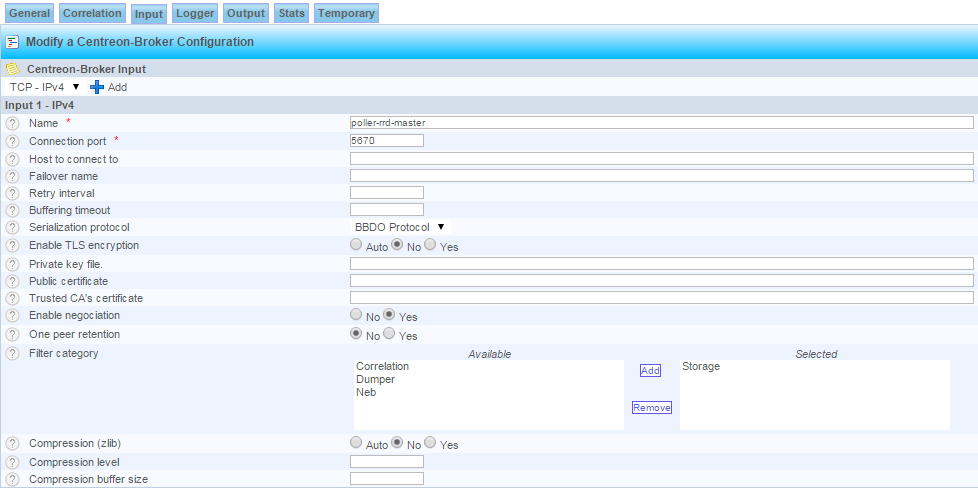
Add an IPV4 output type
Step 3 : Logger tab
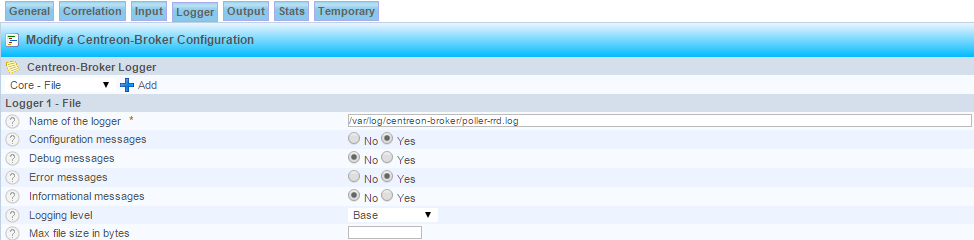
Add a Logger of File type
Step 4 : Output tab
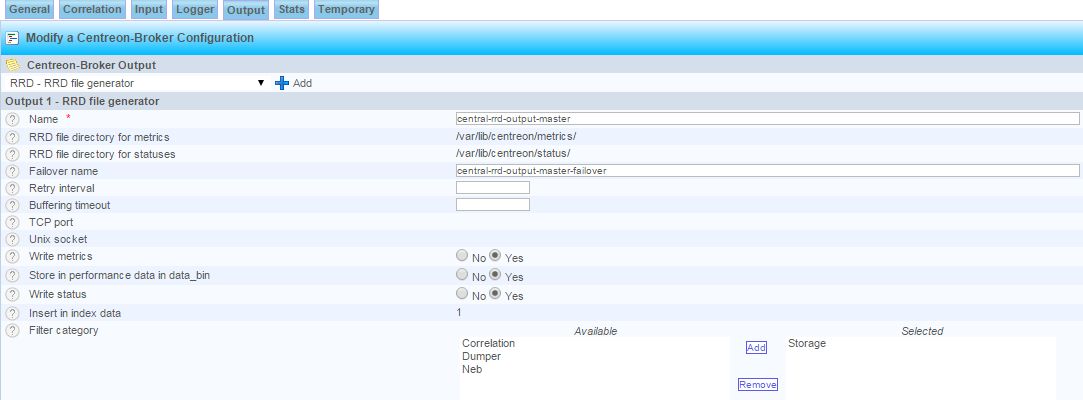
Add an IPV4 output type
Step 5 : Add a Failover
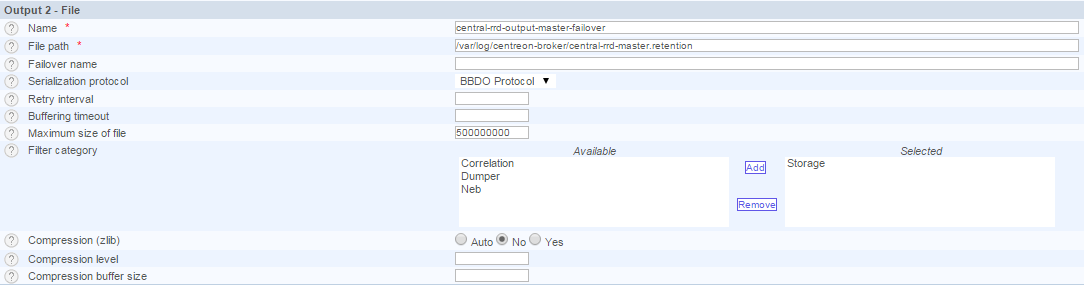
Add a File output type
You can now validate form. Configuration is done for this object.
Warning
On the Central web interface in the menu : Administration > Options > Centstorage > Options, the option Enable resources’s insertion in index_data by Centreon must be checked.
You can now proceed to the next step to apply changes.