Manually configuring a poller
Configuring the server
Once the installation is complete, you must integrate this remote poller into the Centreon configuration.
Go into the menu: Configuration > Pollers.
Duplicate the central server and edit it.
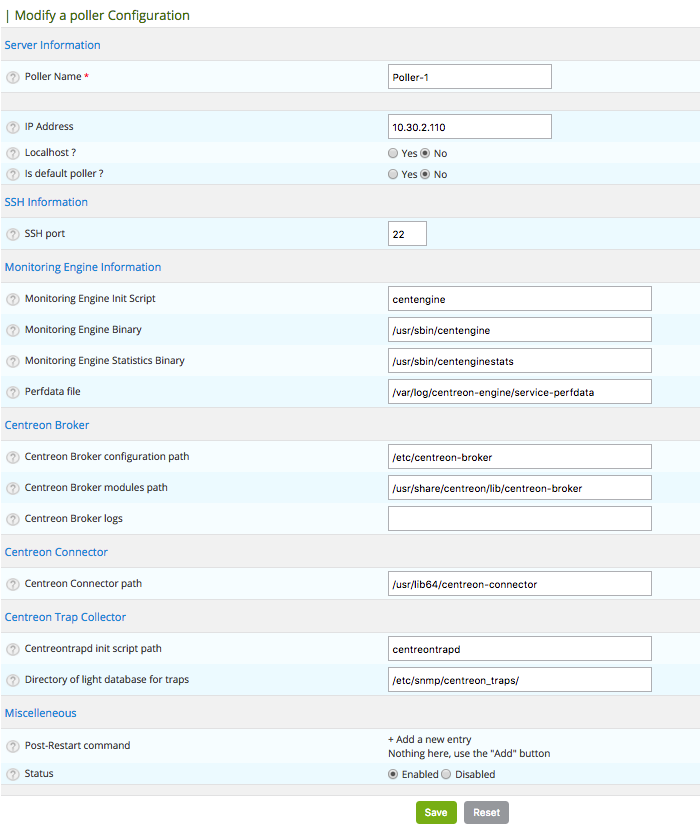
Change the following settings, and save:
Change the name of Poller Name.
Enter the IP address of the poller in the IP Address field.
Enable the poller by clicking on Enabled in the Status field.
Go to the Configuration > Pollers > Engine configuration menu.
Select your last added configuration.
Change the following settings, and save:
In the Files tab:
Modify Configuration Name.
Check that Linked poller is the previously created poller.
Change if necessary Timezone / Location.

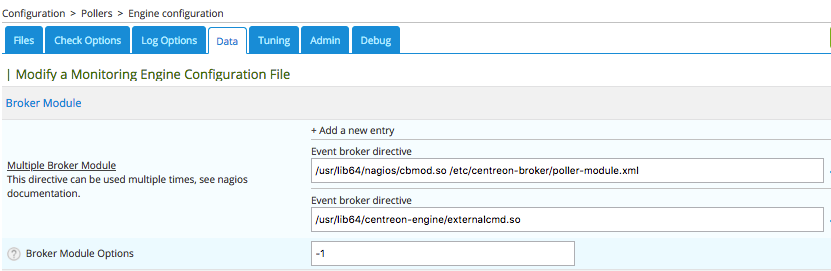
In the Data tab - Multiple Broker Module fields check / add the following entries:
/usr/lib64/centreon-engine/externalcmd.so

/usr/lib64/nagios/cbmod.so /etc/centreon-broker/poller-module.xml
Centreon Broker configuration
You must generate a configuration file for Centreon Broker:
Go into the menu: Configuration > Pollers > Broker configuration.
click on Add.
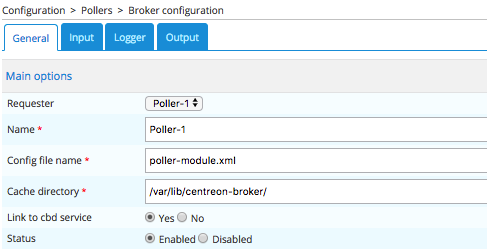
In the General tab:
Select the Requester.
Set Name of the configuration.
Set Config file name that must be exactly the same as the one defined in Centreon Engine configuration (for example, poller-module.xml).
Check the value No for the Link to cbd service option.
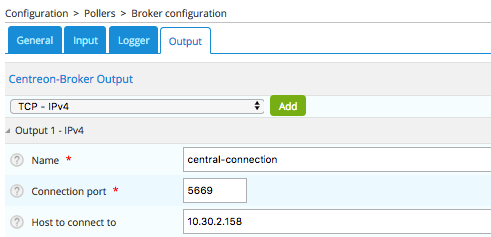
In the Output tab:
Add a new TCP - IPv4 output.
Set the Name.
Set the distant TCP port, by default to 5669.
Set the IP address of the Central server (Host to connect to).
Save the configuration.