Deploying a configuration
Procedure
On creation/deletion/change of objects via the configuration interface, the changes performed are not applied automatically to the scheduler. To apply the changes performed, it is necessary to follow the procedure below.
Note
It should always be done in 2 steps.
First step
Go into the menu: Configuration > Pollers
Choose the pollers which you want to export configuration
Click on Apply configuration

Check the boxes: Generate Configuration Files and Run monitoring engine debug (-v)
Click on Export
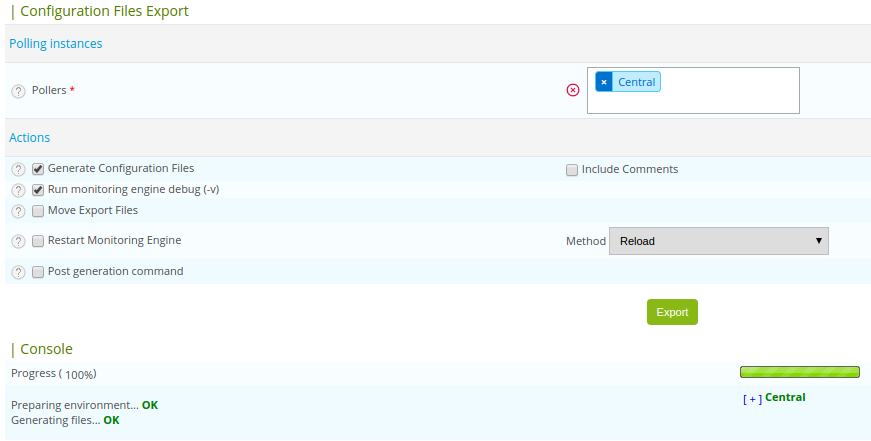
Check that no error appears during generation.
Note
If there are errors, correct the errors and repeat the first step.
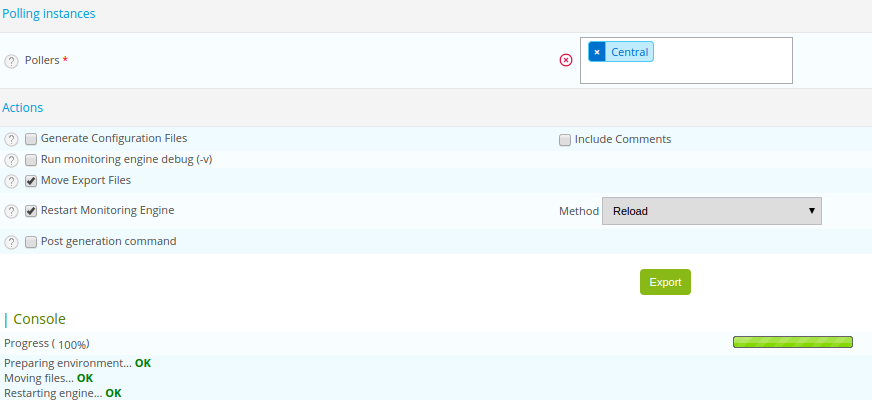
Second step
Uncheck the boxes: Generate Configuration Files and Run monitoring engine debug (-v)
Then check the boxes: Move Export Files and Restart Monitoring Engine
Click on Export
Note
The Post generation command option can be used to request the execution of the command post-generation set at the configuration of the scheduler.
Explanations
Multiple options are available in the configuration generation page:
Generate Configuration Files: Generates the scheduler configuration files in a temporary directory. This configuration is generated from objects configured via the web interface
Run monitoring engine debug (-v): Enables the scheduler to check the generated configuration
Move Export Files: Moves the configuration files from the temporary directory to the scheduler directory
Restart Monitoring Engine: Restarts the scheduler to apply the new configuration files
Post generation command: Executes the command post-generation set at the configuration of the scheduler level